

介绍
uuv_simulator是一款基于ROS&Gazebo平台开发的水下机器人仿真平台,能为水下机器人的应用与算法提供一个较为理想的仿真环境进行测试。提供了许多到手即用的地图和插件,但是官方的wiki做的并不全面,很多东西都需要自己去阅读源码才能明白一些功能到底要如何使用,笔者在阅读过程中就被这跳来跳去的launch文件折磨的极为痛苦,代码里面还基本没有什么注释,所以记录下来,一是怕自己忘记,二是方便后人。很遗憾,该项目目前只有ROS1版本能使用,即不支持Ubuntu22即以上。
其主要提供以下功能:
- Gazebo/ROS 插件:提供了水下机器人仿真的基础插件。
- Fossen 的运动方程:实现了水下机器人的运动方程。
- 推进器模块:支持推进器转速到输出推力的转换。
- 传感器插件:模拟水下环境中的传感器。如DVL,压力计,声呐等
- 控制器:包括 AUV 和 ROV 的多种控制器,如 PID 控制器、滑膜控制等。
建议想上手学习的同学先阅读Fossen在 《Handbook of Marine Craft Hydrodynamics and Motion Control》一书中的相关课件
环境搭建与安装
因为虚拟机无法调用显卡导致gazebo卡顿严重的关系,我选择直接在物理机安装ubuntu20.04。
CPU:Intel i7-9750H,GPU:NVIDIA GeForce GTX 1650
Ubuntu20 安装uuv_simulator (ROS-Noetic)
sudo apt-get install -y ros-noetic-geodesy
mkdir -p ~/catkin_ws/src && \
cd ~/catkin_ws/src && \
git clone --branch noetic https://github.com/arturmiller/uuv_simulator.git
测试例程
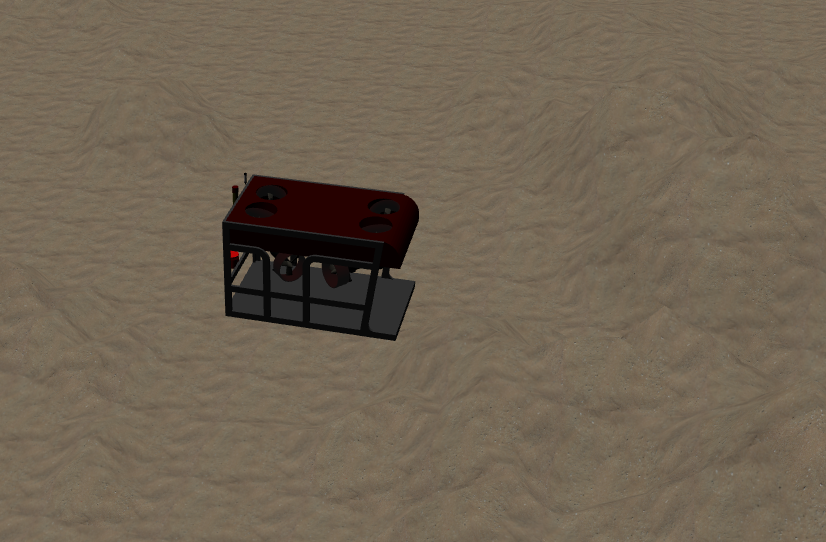
uuv_simulator里面自带了许多开箱即用的例程包,比如rexrov。
运行rov沿着螺旋线前进的例子
roslaunch uuv_gazebo start_nmb_smc_demo.launch
这是一个rov的位置控制采用滑膜控制的例程,如果你接了手柄,可以利用手柄控制rexrov的移动
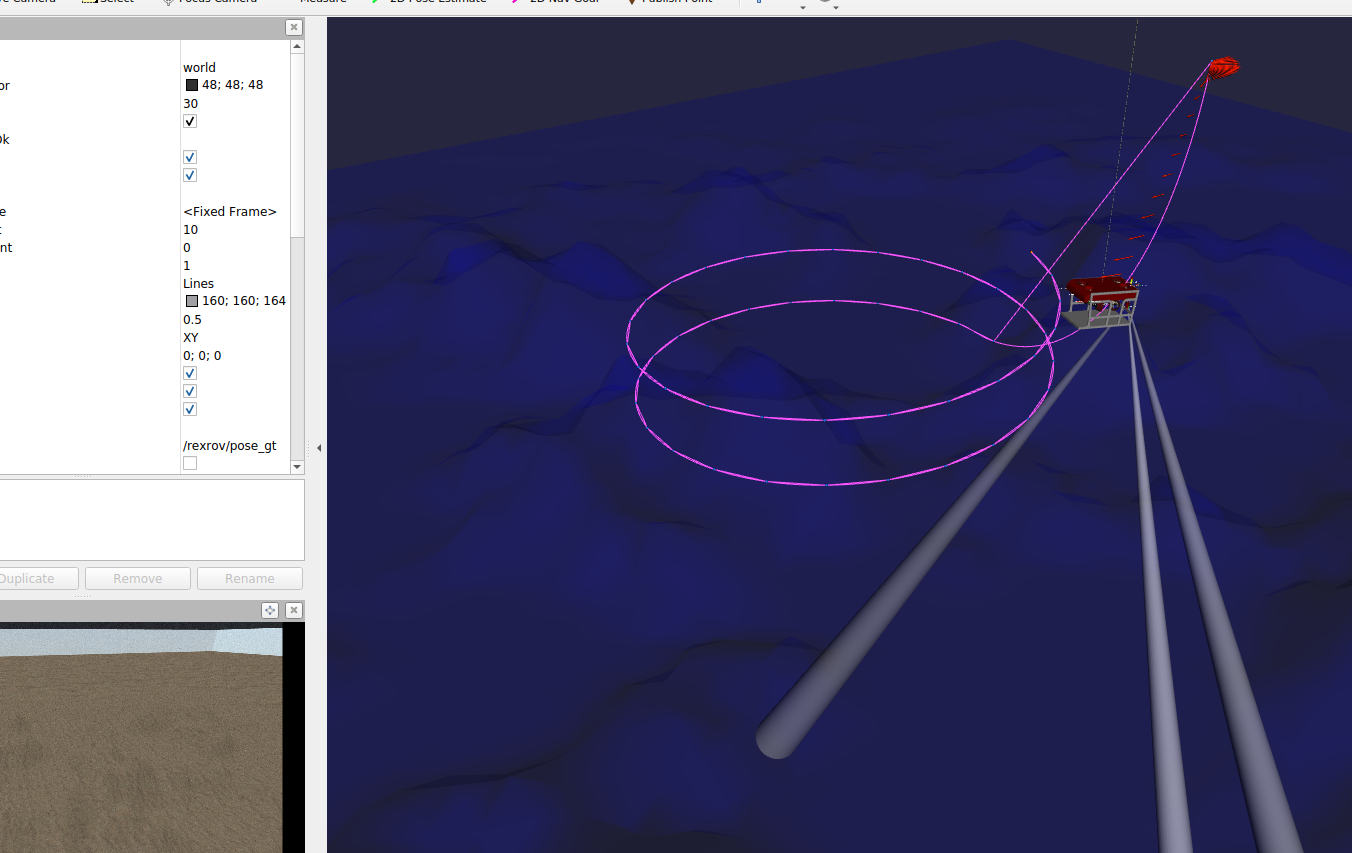
开启另一个终端输入如下,即可看到rexrov沿着螺旋轨迹前进
roslaunch uuv_control_utils start_helical_trajectory.launch uuv_name:=rexrov n_turns:=2
创建自己的UUV模型
具体详尽的教程可以在 官方教程 这里我只做几点补充
推进器控制相关的代码和参数都在xxx_control这个包里面,uuv的描述文件与水动力系数等参数,都在xxx_description包里面。按照官方教程,如果我们螺旋桨位置描述正确,输入以下代码,uuv的推力分配矩阵会被自动创建,保存在xxx_control/config/TAM.yaml文件内,当然我们也可以移植别人的模型,导入自己的模型,然后修改这个推力分配矩阵。
roslaunch <ROBOT_NAME>_control start_thruster_manager.launch reset_tam:=true
在uuv_description这个包里面就为我们提供了rexrov的描述文件,我们可以点进源码查看。
- robots/rexrov_default.xacro 就是一个默认的整体的xacro,当然里面包含了许多其他的xacro插件。
- urdf文件夹内就包含机器人的其他xacro:
- base.xacro是描述uuv本体的可视化模型,质量,惯性矩等
- actuators.xacro描述推进器或AUV的鳍的位置参数
- sensor.xacro通常描述uuv搭载的各种传感器参数
- snippets.xacro描述了推进器和鳍插件的具体细节,会被actuators.xacro调用。推进器的效率,转速推力映射,传递函数等都可以在这个里面设置,包括AUV鳍的升力系数和阻力系数(Lift and drag model)定义,具体含义请阅读 执行机构参数配置
- gazebo.xacro描述了uuv的水动力系数,包括体积(计算浮力),重浮心,附加质量矩阵,粘性矩阵(一次和二次),各矩阵代表什么,可以自己去fossen的书里面查阅。
- mesh文件夹内包含了uuv本体,螺旋桨或者其他配件的DAE或stl格式的文件,用于可视化
- launch文件夹内的upload.lauch就是加载我们uuv模型用的,一个正常编写的xacro文件应该能在gazebo里面看到我们的uuv,在tf树里面看到如下坐标变换关系,如果看到tf树有异常,请对比rexrov例程检查xacro或launch文件的写法
rosrun rqt_tf_tree rqt_tf_tree

在start_thruster_manager.launch这个文件启动后,推进器推力管理器工作,我们可以直接向
- /xxx/thruster_manager/input
- /xxx/thruster_manager/input_stamped
这两个话题发布想给uuv的外部推力,管理器会直接帮我们根据TAM.yaml的推力分配矩阵解算出各个推进器的推力,当然,如果我们自己算法有别的要求,也可以直接向推进器的话题(/xxx/thrusters/x/xxx)发送转速(会根据snippets.xacro参数进行真实的推力转换)或者推力。
#给uuv的x方向施加10N外部推力
rostopic pub /rexrov/thruster_manager/input geometry_msgs/Wrench "force:
  x: 10.0
  y: 0.0
  z: 0.0
torque:
  x: 0.0
  y: 0.0
  z: 0.0"
例程控制器代码解析
uuv_simulator提供了一些我们可以到手即用的路径跟踪的控制器,有pid控制、滑膜控制的控制类 等,你可以在uuv_trajectory_control功能包里面的scripts和src文件夹下找到他们。这些控制器都继承于 DPControllerBase
基类(定义在uuv_trajectory_control/src/uuv_control_interfaces/dp_controller_base.py),我们需要创建自己的控制器时,只需要复写其中的控制逻辑即可。当然,你也可以选择摒弃这一套,自己来写一套控制代码来操纵UUV。
话不多说,我们开始研究该基类到底做了什么,它是怎么样让gazebo里面的模型动起来的。
def __init__(self, is_model_based=False, list_odometry_callbacks=None,
             planner_full_dof=False):
    # Flag will be set to true when all parameters are initialized correctly
    self._is_init = False
    self._logger = get_logger()

    # Reading current namespace
    self._namespace = rospy.get_namespace()

    # Configuration for the vehicle dynamic model
    self._is_model_based = is_model_based

    if self._is_model_based:
        self._logger.info('Setting controller as model-based')
    else:
        self._logger.info('Setting controller as non-model-based')

        self._use_stamped_poses_only = False
    if rospy.has_param('~use_stamped_poses_only'):
        self._use_stamped_poses_only = rospy.get_param('~use_stamped_poses_only')

        # Flag indicating if the vehicle has only thrusters, otherwise
        # the AUV allocation node will be used
        self.thrusters_only = rospy.get_param('~thrusters_only', True)

    # Instance of the local planner for local trajectory generation
    self._local_planner = LocalPlanner(
            full_dof=planner_full_dof,
            stamped_pose_only=self._use_stamped_poses_only,
            thrusters_only=self.thrusters_only)

        self._control_saturation = 5000
        # TODO: Fix the saturation term and how it is applied
        if rospy.has_param('~saturation'):
            self._thrust_saturation = rospy.get_param('~saturation')
            if self._control_saturation <= 0:
                raise rospy.ROSException('Invalid control saturation forces')

        # Flag indicating either use of the AUV control allocator or
        # direct command of fins and thruster
        self.use_auv_control_allocator = False
        if not self.thrusters_only:
            self.use_auv_control_allocator = rospy.get_param(
                '~use_auv_control_allocator', False)

        # Remap the following topics, if needed
        # Publisher for thruster allocator
        if self.thrusters_only:
            self._thrust_pub = rospy.Publisher(
                'thruster_output', WrenchStamped, queue_size=1)
        else:
            self._thrust_pub = None

        if not self.thrusters_only:
            self._auv_command_pub = rospy.Publisher(
                'auv_command_output', AUVCommand, queue_size=1)
        else:
            self._auv_command_pub = None

        self._min_thrust = rospy.get_param('~min_thrust', 40.0)

        self._reference_pub = rospy.Publisher('reference',
                                              TrajectoryPoint,
                                              queue_size=1)
        # Publish error (for debugging)
        self._error_pub = rospy.Publisher('error',
                                          TrajectoryPoint, queue_size=1)

        self._init_reference = False

        # Reference with relation to the INERTIAL frame
        self._reference = dict(pos=np.zeros(3),
                               rot=np.zeros(4),
                               vel=np.zeros(6),
                               acc=np.zeros(6))

        # Errors wih relation to the BODY frame
        self._errors = dict(pos=np.zeros(3),
                            rot=np.zeros(4),
                            vel=np.zeros(6))

        # Time step
        self._dt = 0
        self._prev_time = rospy.get_time()

        self._services = dict()
        self._services['reset'] = rospy.Service('reset_controller',
                                                ResetController,
                                                self.reset_controller_callback)

        # Time stamp for the received trajectory
        self._stamp_trajectory_received = rospy.get_time()

        # Instance of the vehicle model
        self._vehicle_model = None
        # If list of callbacks is empty, set the default
        if list_odometry_callbacks is not None and \
            isinstance(list_odometry_callbacks, list):
            self._odometry_callbacks = list_odometry_callbacks
        else:
            self._odometry_callbacks = [self.update_errors,
                                        self.update_controller]
        # Initialize vehicle, if model based
        self._create_vehicle_model()
        # Flag to indicate that odometry topic is receiving data
        self._init_odom = False

        # Subscribe to odometry topic
        self._odom_topic_sub = rospy.Subscriber(
            'odom', numpy_msg(Odometry), self._odometry_callback)

        # Stores last simulation time
        self._prev_t = -1.0
        self._logger.info('DP controller successfully initialized')
观察其构造函数,包含了许多条件变量,我们重点看以下几个
- self._vehicle_model : 包含了uuv关于其本体的参数,包括重浮心,当前位姿速度和水动力系数等等
- self._local_planner : 局部路径规划器,负责根据当前uuv的位姿来生成局部的参考路径点,接收来自手柄或者沿螺旋航行或画圆或者随机点
(定义在uuv_trajectory_control/src/uuv_control_interfaces/dp_controller_local_planner.py)
- self.update_errors : 成员函数,更新位姿参考值和更新误差
- self.update_controller : 成员函数,这里需要子类进行重载,由用户自行定义
- _odometry_callback : 里程计回调函数,它会执行我们创建 DPControllerBase 指定的list_odometry_callbacks 里面的函数变量,如果我们没有指定,那么会默认执行 self.update_errors 和 self.update_controller 。
所以整个控制器的运行逻辑步骤如下:
- 构造函数内 self._odom_topic_sub 订阅 'odom' ,这个话题会被重映射为 '/xxx/pose_gt' , gazebo所计算出来位姿、速度信息就会发布到这个上面, 频率为20hz。
- odometry_callback 执行 self.update_errors 和 self.update_controller 两个函数,update_errors 会执行 update_reference 更新参考路径点,具体代码如下
# Update the local planner's information about the vehicle's pose
self._local_planner.update_vehicle_pose(
    self._vehicle_model.pos, self._vehicle_model.quat)  #更新uuv位姿信息

t = rospy.get_time()
reference = self._local_planner.interpolate(t) #更新参考路径点
- interpolate() 函数的执行过程中会调用 TrajectoryGenerator 类里面的 generate_reference 函数,根据当前的时间以及预瞄的时间,来计算参考的点位
- 运行 update_controller 的控制算法,里面的内容由用户自己决定,可以参考官方那几个例子的写法照猫画虎
